Have you ever been frustrated with the slow loading times of your Next.js website, especially when loading a lot of images? You’re not alone. Unoptimized images are one of the leading causes of poor website performance, which can lead to a poor user experience and decreased SEO rankings.
Luckily, Next.js has advanced features to help you optimize images efficiently to solve this problem. This article will reveal the secrets of image optimization in Next.js, giving you a step-by-step guide to creating a super-fast, responsive, and search engine-friendly website. Ready to significantly improve the performance of your Next.js website? Let’s get started!
Why is Image Optimization Important?
1. Impact on Loading Speed
Large images are one of the main causes of slow loading times on a website. When a user accesses a page, the browser must download all the assets including images. The larger the image file size, the longer it takes for this downloading process. Slow page load times can significantly increase the bounce rate, which is the percentage of visitors who leave a website after viewing only one page.
2. Impact on User Experience (UX)
User experience (UX) is greatly influenced by website speed, and unoptimized images play a negative role in this. A slow website feels frustrating and unprofessional to visitors. They may experience lag when scrolling, images that appear late, or even a messy layout when images have not fully loaded. This poor experience can reduce user satisfaction, decrease the time they spend on the website, and reduce the likelihood of them returning.
3. Implications for SEO
Search engines like Google consider site speed to be one of the important factors in determining page rankings in search results. Websites that load quickly tend to rank better because they provide a better user experience. On the other hand, websites with slow loading times can be penalized with lower rankings.
4. Bandwidth Efficiency
Unoptimized images consume more bandwidth, both for users and the website server. For users with limited internet connections or low data quotas, downloading large images can quickly eat up their data and slow down their overall browsing experience.
On the server side, large data transfers from inefficient images can increase hosting costs and potentially cause performance issues during traffic spikes. Image optimization helps reduce bandwidth usage significantly, resulting in a better user experience and more efficient operational costs for website owners.
What is the Next.js Image Component?
The Next.js <Image> component is a React component designed specifically to optimize image rendering in Next.js applications. More than just a replacement for the regular HTML <img> tag, <Image> offers a variety of built-in features that automatically improve the performance of your website. It allows you to load images responsively, perform automatic lazy loading (only loading images when they enter the viewport), and even optimize image formats to produce smaller file sizes without significantly sacrificing visual quality.
By using <Image>, developers can easily implement image optimization best practices without the need for complicated manual configuration, contributing to faster page load times, better user experience, and potential SEO ranking improvements. Additionally, this component also helps prevent Cumulative Layout Shift (CLS) issues by ensuring proper space is allocated to images before they are fully loaded.
How to Optimize the Next.js Image Component
1. Size Optimization
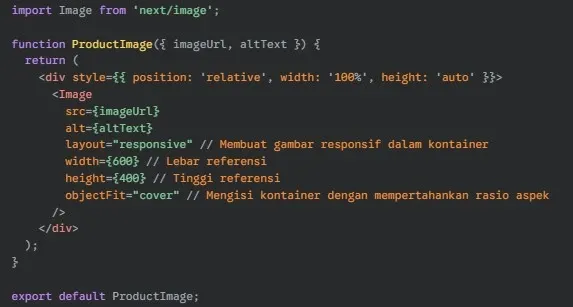
The <Image> component automatically optimizes the size of images by generating a range of sizes (breakpoints) and serving them to the browser based on the screen size of the user’s device. This means that the browser only downloads images that fit within its dimensions, avoiding downloading unnecessary high-resolution images on small devices.
To enable size optimization, you need to provide the width and height properties to the <Image> component. Next.js will use this information to calculate the aspect ratio and automatically generate a range of image sizes when using its native Image Optimization API or a configured third-party service.
2. Visual Stability
One common issue with images on the web is Cumulative Layout Shift (CLS), where the page content shifts unexpectedly as the image loads. The <Image> component helps solve this problem by requiring the width and height properties.
By knowing the dimensions of the image up front, Next.js can reserve the appropriate space in the page layout before the image loads. This prevents layout shifts that disrupt the user experience. Make sure the width and height values match the aspect ratio of your original image.
3. Asset Flexibility
The <Image> component supports a variety of image sources, including local images (in the public directory), imported images, and external URLs. When using local or imported images, Next.js can optimize them during the build process.
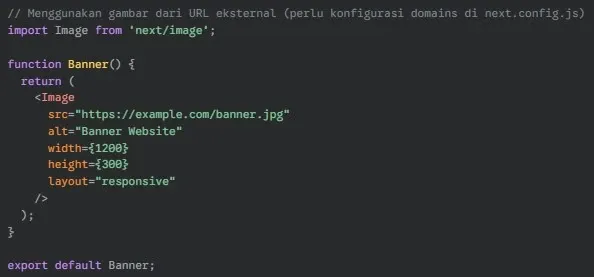
For external images, you’ll need to configure domains in your next.config.js file to allow Next.js to optimize them (if you’re using the built-in image optimization feature). Additionally, the layout property lets you control how images fit within their containers (fixed, intrinsic, responsive, fill).
4. Faster Page Loading
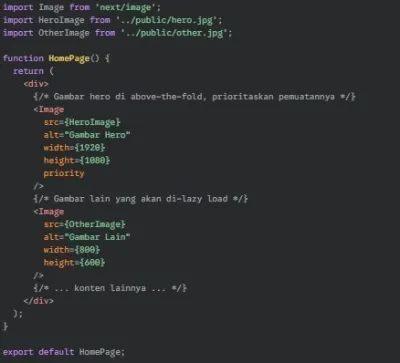
The <Image> component implements lazy loading by default. This means that new images are loaded as they approach or enter the user’s viewport. This significantly reduces the initial page load time because the browser doesn’t have to download all the images at once.
You can also use the priority property for important images that are above-the-fold (the first part of the page visible without scrolling). Setting priority to true will load those images earlier.
Best Practices for Optimizing Images in Next.js
1. Use Static Imports for Local Images
When working with local images, static imports (using imports) are the recommended way to go. This allows Next.js to analyze and optimize images during the build process. The main advantage is that Next.js can provide dimension information and optimize assets more efficiently.
2. Specify Width and Height for Remote Images
For images that come from external sources, always specify the width and height properties on the <Image> component. This information is crucial for Next.js to reserve the right space in the page layout. This way, Cumulative Layout Shift (CLS) issues can be avoided when images are loaded.
3. Always Use the Alt Prop
The alt property is required for every use of the <Image> component. This alternative text is important for accessibility, helping screen readers understand the content of the image. In addition, the alt prop also contributes to SEO by providing context to search engines.
4. Take Advantage of the Placeholder Prop
The placeholder property can improve the user experience while images are loading. Setting placeholder=”blur” will display a blurred version of the image as a loading indicator. To use it, you need to provide blurDataURL, which is the URL data of the blurred version of the image.
Conclusion
Optimizing images in Next.js is the key to a fast, responsive, and SEO-friendly website, which can be achieved by utilizing the <Image> component and various best practices such as format selection, lazy loading, and dimensioning. With optimal website performance, you not only improve the user experience but also the growth potential of your business.


